Categorising a website in Websense / Forcepoint
When we own a website, we have to make sure that our website is accessible from all the systems without any sort of proxy blocking. I work in a software organization, which uses Websense/Forcepoint, a security solution for the organization’s network.
Websense/Forcepoint is used by government or business organizations to protect their networks from cybercrime, malware, and data theft, as well as prevent users from viewing sexual or other inappropriate content and discourage employees from browsing non-business-related websites. Forcepoint uses a combination of classification engines, filtering categories, data fingerprints, and word filters designated by the individual customer’s network policy.
Recently, when I tried to open my website in my company’s system, I found that my website is been blocked stating – _“www.balasubramanyamlanka.com is categorised under Websites Uncategorised. Access Denied.” _For many days, I didn’t understand the process. Then I have started digging about the Websense and then understood how websites are categorised by Websense/Forcepoint.
Usually, when a website is newly launched into the internet, Websense tries to categorise and save into its database. If it is not able to categorise, It will save as Uncategorized into the database. Whoever is using the Websense security solutions, they can write their own filtration rules/conditions for accessing the websites. Usually, Organizations won’t allow users to access the uncategorized websites
Whoever is using the Websense security solutions, they can write their own filtration rules/conditions for accessing the websites. Usually, Organizations won’t allow users to access the uncategorized websites. If we find that our website is not categorised properly, we can raise a request through their website and categorise our website properly.
Steps to categorise a website in Websense / Forcepoint
- Register [https://www.websense.com/content/Registration.aspx] by using your website’s domain email (if your website is www.balasubramanyamlanka.com then your email would be like abc@balasubramanyamlanka.com)
- A verification link and the security code will be sent to your registered email. Open the verification link sent and enter the security code. This will be followed setting up the password.
- After the verification process, you will be asked to log in again.
- After logging in, go

</figure>
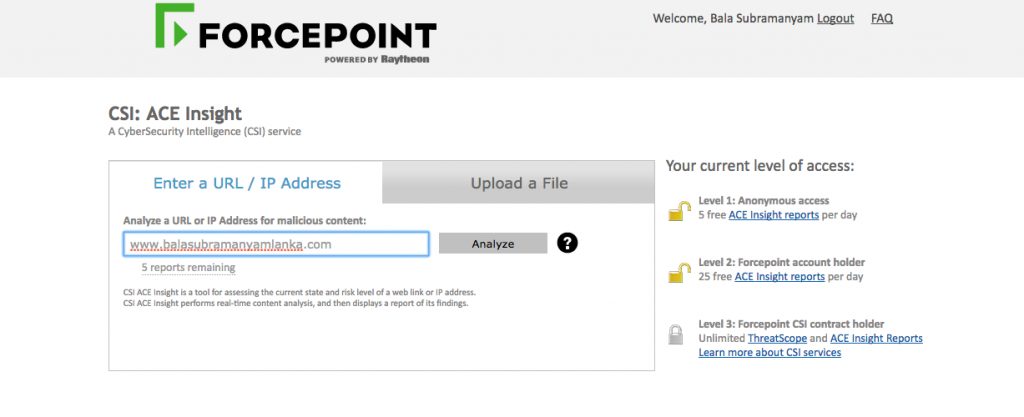
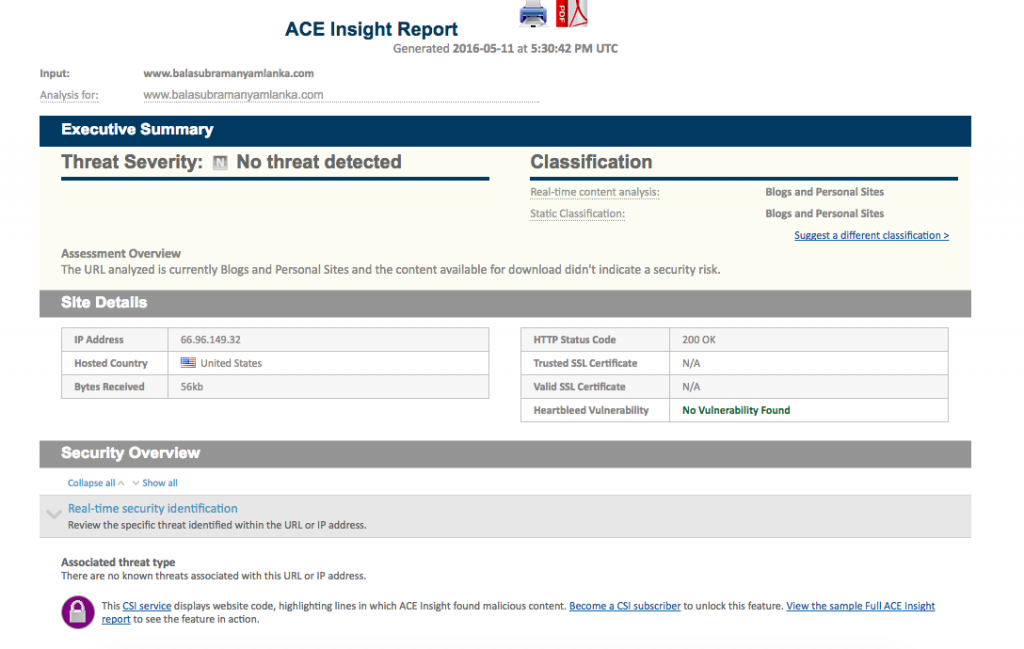
- Enter you website address and click on analyse button. After the analysis you will find the analysis as follows.

</figure>
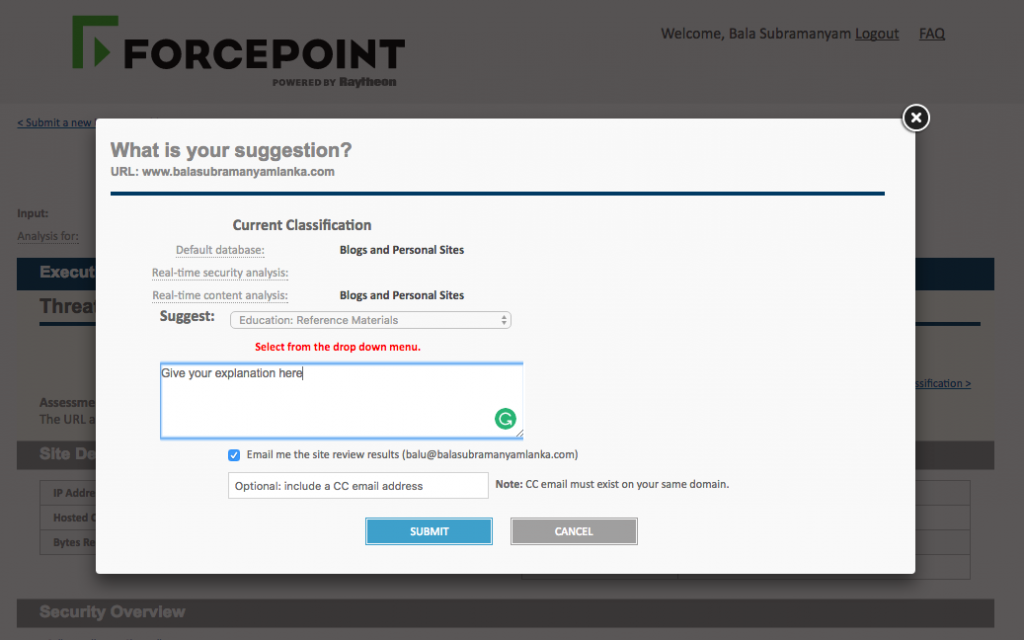
- Click on Suggest a different classification to submit the new category for your website.

</figure>
- You will get an email as registering your category. After the next database update of Websense, Your website category in the Websense will be changed. It took 24 hours for me for the database update.
Happy Learning! Happy Exploring!!
Sources:
- https://en.wikipedia.org
- https://www.forcepoint.com
Enjoy Reading This Article?
Here are some more articles you might like to read next: